The Justification
I have an opportunity to do some travel where I'd want to have a bike, the duration would be too long to afford renting a bike, and to much of a logistics nightmare to take a full-size bike box. That along with the promise of saving a few hundred bucks in airline fees alone, pushed me to consider replacing my current Habanero Cycles commuter/gravel/'cross frame with a new frame that had travel couplers installed. These are more commonly identified as the Bicycle Torque Couplers built by S&S Machine.
One option would be to simply have couplers installed on this frame. Apparently even the ovalized tube can be accommodated by Bilensky Cycle Works. But retrofitting my titanium frame would be a ~$1000 proposition. Worst of all it would mean being without my commuter bike for awhile.
No, this was as excuse to replace my frame. There were a few things I have thought I would change about the Habanero frame, so this was the opportunity to do so.
I've been really happy with my Waltly road bike, and I knew they offered travel couplers for bikes, so I decided to talk to them about building a frame to my specifications.
The Frame Design
Having worked with Amy at Waltly before, I knew the procedure. I initially inquired about the availability and price of couplers; Amy provided pricing for the full thread-on BTC-style coupler as well as the split tube option -- similar to the Ritchey Breakaway. Since my frame would be large it seemed like couplers on both top tube and down tube would be necessary if I really wanted it to fit in airline-legal luggage size (unlike the Ritchey case, for example, which is 3" over the limit). The couplers were quoted at $275 each, which obviously is pretty significant when you consider that the base ti road frame from Waltly is $800.Head Tube
The first thing I wanted to fix about the Habanero was support for a tapered-steerer fork. Granted, I like the [straight 1 1/8] Spot CX fork I'e been using, but I really like thru axle a lot, and there aren't any thru-axle carbon forks that spec straight steerers. Frankly, straight 1 1/8 is obsolete for this kind of bike.
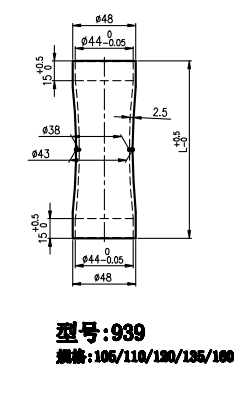
Waltly provided a catalogs of their head-tube designs:


I decided to go for a 44mm head tube, but liked the subtle hourglass shape of No. 939.
Dropouts
I debated on thru-axle vs. QR. The main reason I considered QR is that I pull a Chariot trailer every day to pick up my son -- and I wasn't sure how this would work with thru-axle, especially the recessed (breezer-style) dropouts Waltly uses for their 142x12. After a little research I found two solutions that looked like they might work.
I decided to buy the Burley, since it looked like it would provide more clearance to ensure the receiver would clear the frame. And it was a little cheaper. (Turns out that it works great, but in retrospect the Robert's Axle version might have worked too.)
So I settled on doing 142x12. Waltly recommended their newer "DT Swiss"-style dropouts (instead of Shimano E-Type-style) which have the threads in the dropout instead of requiring the threaded "nut". Sure, sounds great.
I did opt for post-mount, though. No need to bolt on an adapter. For 160mm of course.
 I think most (all?) of my previous seat-stay-mounted, disc-brake frames have not had a structural brace for the brake forces (inside the NDS rear triangle), but I went ahead and spec'd one on this frame.
For the cable routing, I wanted it on top of the top tube (in case I want to do some CX and shoulder the bike) but on the insides of the seat stays. This is the same routing as used on the Foundry Overland, for example:

And also similar to the Overland, I wanted 100% zip-tie "stops", to make pulling off the cables and hoses easy for packing/travel.
While I don't have plans to mount a rack to this frame, the goal here was versatility, so I went ahead and requested both fender and rack mount points on the seat stays.
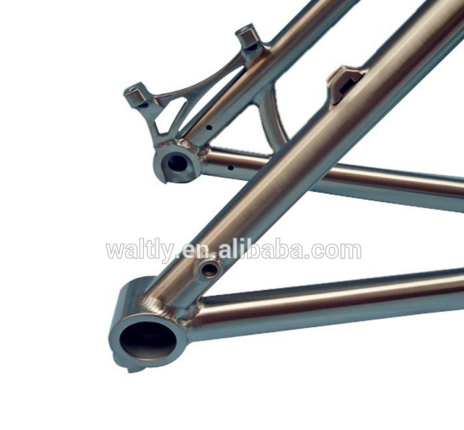
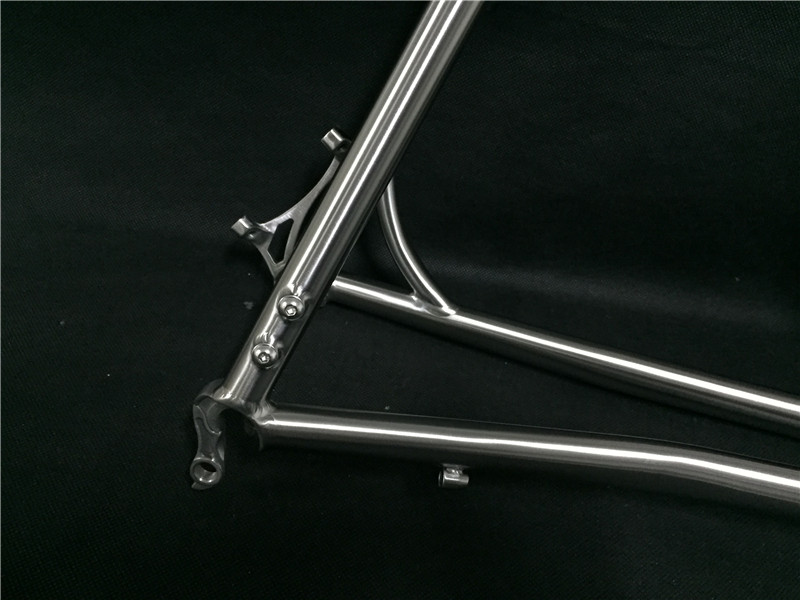
For the seat stay bridge, I found an example on one of their frames that I really like aesthetically. I don't know if they did this specially for me (since I'm not using this for mounting brake calipers), but mine is also drilled from the bottom in case I have a fender that can mount like that.
Brake Mount and Cable Routing
The age-old debate of mounting the calipers to the seat stay vs. chain stay. Normally, I'm a big fan of calipers on the chain stay, as it is out of the way -- never a concern for fender (or, heaven forbid, rack) mounting. But there are two reasons that I opted to stick with seat-stay mounting for this build: (1) I wanted to run the hose and the derailleur along the top tube and wanted symmetrical cable/hose routing and (2) I really didn't want to replace the hose on my rear brake with a longer hose. The SRAM HRD calipers tuck in neatly and have not conflicted with fender stays (even without any spacers).I did opt for post-mount, though. No need to bolt on an adapter. For 160mm of course.
For the cable routing, I wanted it on top of the top tube (in case I want to do some CX and shoulder the bike) but on the insides of the seat stays. This is the same routing as used on the Foundry Overland, for example:
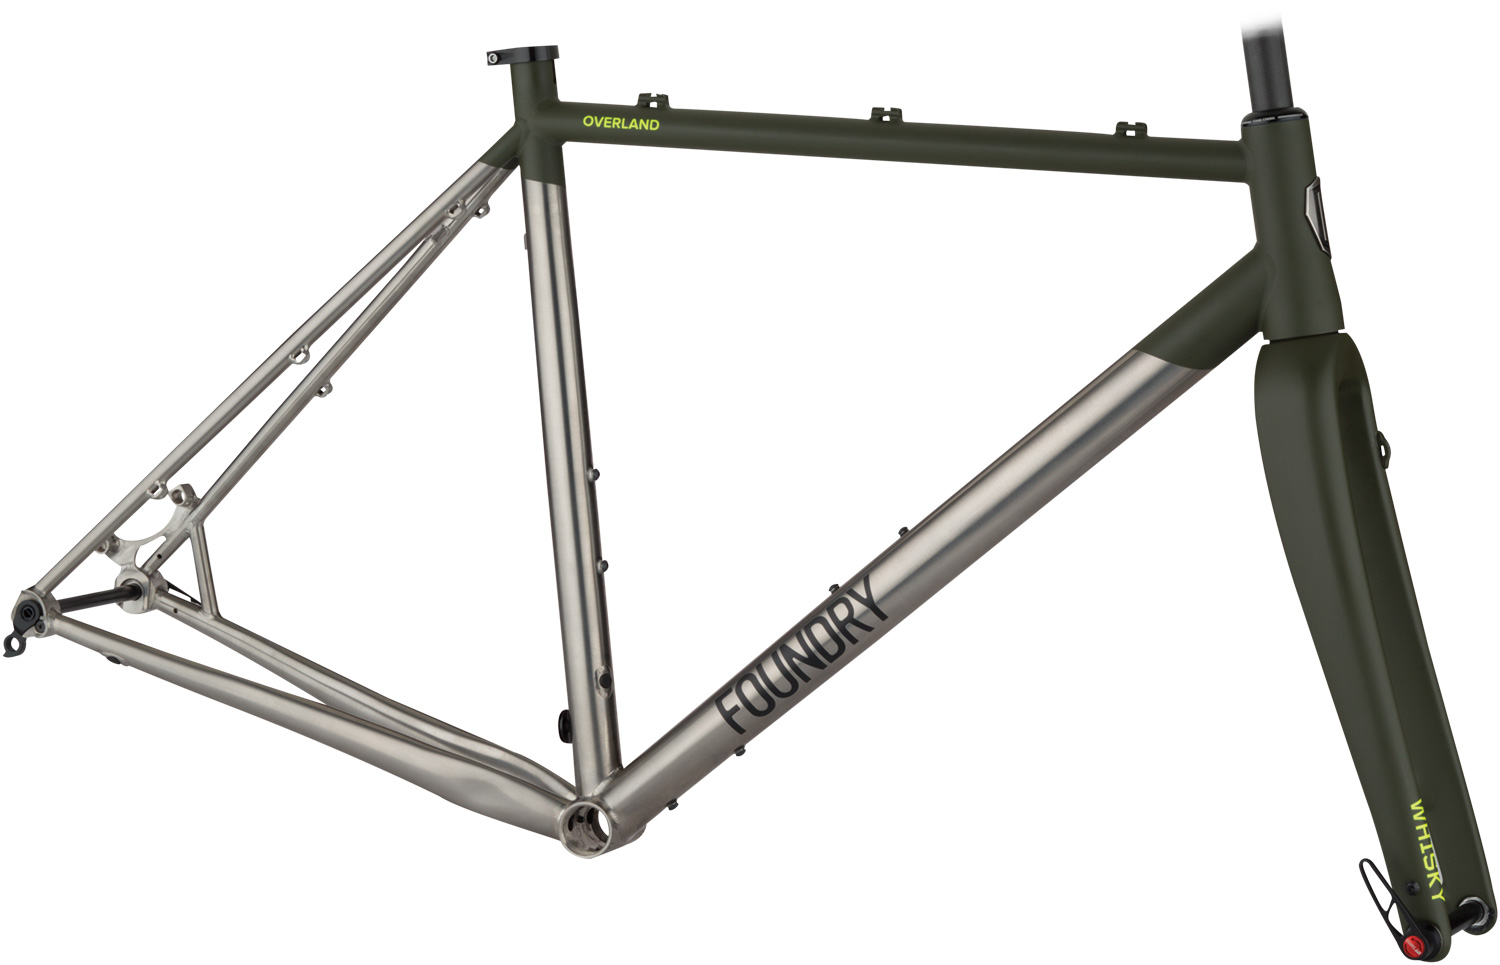 |
| Other than geometry, the Foundry Overland is a perfect frameset. |
And also similar to the Overland, I wanted 100% zip-tie "stops", to make pulling off the cables and hoses easy for packing/travel.
While I don't have plans to mount a rack to this frame, the goal here was versatility, so I went ahead and requested both fender and rack mount points on the seat stays.
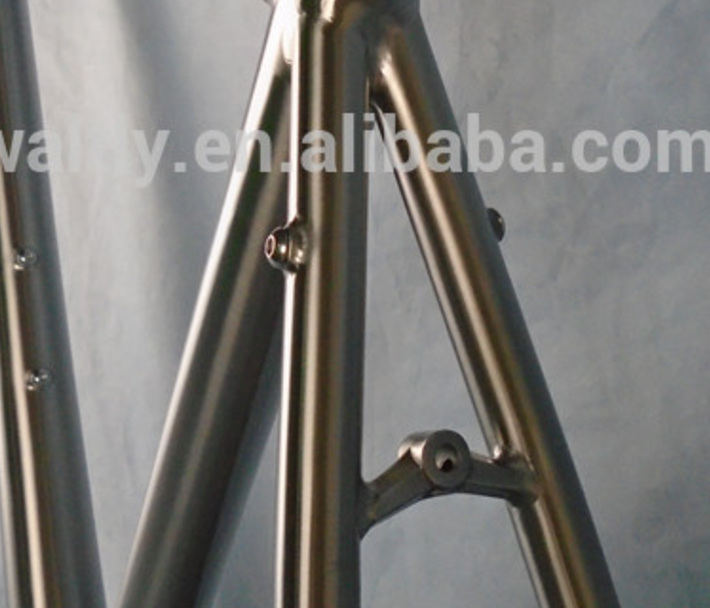
 |
| Fender and rack mounts. |
 |
| I like this seat stay bridge. |
Other Details
A few other minor details about the build for those that are curious about the full picture.- Tube dimensions:
- Top tube: 34.9*0.9mm (size restricted by use of couplers)
- Seat tube: 31.8*0.9mm
- Down tube: 34.9*0.9mm (size restricted by use of couplers)
- Chainstay: 22.2mm*0.9T
- Seatstay: 16mm*0.9T
- Seat-tube slot in back.
- Chainstay bridge, drilled for fender mount.
- Handbrushed finish for the frame.
Originally I was not planning to add any graphics to the frame. But then I was staying up late watching a NOVA documentary on Viking swords and decided to pay homage to my Norse heritage and have Ulfberht sand blasted on the down tube. I was proud of figuring out how to create a vector version in Inkscape for the project.

It's subtle enough (as I knew it would be) that no one has asked about it. That's probably for the best. My wife thinks this is extremely geeky.
The Designs
Having done this before, I was careful to specify everything up front. Also, I didn't go back and forth on what I wanted. I'm sure Amy at Waltly appreciated this.
Within a day or so after approving the overall project & paying the deposit, I had the first design!
 |
| Version 1 |
 |
| Version 2 (Final) |
So that was an easy fix and then we were done!
Completed Frame
Just around 45 days later, the frame was finished and photos were provided for my review.


Fork
For the fork I looked around for awhile. I wanted exactly:
- 395-400mm axle-to-crown
- 160mm post mount
- 15mm or 12mm thru axle
- Tapered (1.125"-1.5") steerer.
- External hose routing
- Fender mounts
The perfect fork would be the Whisky No 9 CX fork; however, that's also pretty pricey. I may eventually get that fork, but to start with Nancy at Hongfu informed me that their CX fork could be ordered with fender mounts!

Finished!
Once I had the fork, frame, headset, and Burley TA (so I could pull the trailer), the build was pretty quick. Everything moved over. I did have to re-bleed my brakes since I had to pull the rear brake hose through my drilled-out cable stops on the old frame -- and shorten it ~2cm for the way the cable routes on new frame.
But the final product looks fantastic and is a pleasure to ride. The geometry being exactly the same as my previous frame, what I notice most is the additional stiffness -- not sure where all that's coming from, but with bigger tubes, tapered steerer, and thru axles one would expect it to be stiffer. I love it.


Update - 6 months later
So I've ridden this bike bunch and did end up traveling with it for a couple months. It has been working out really well.
However, I should not that for a while I thought I had a problem with my frame (or, specifically, the couplers). Initially everything went together nicely and I used the S&S-recommended high fluo grease, torqued down the couplers, etc. No noises for a couple weeks. But then I started hearing a creaking sound. These things drive me crazy. And of course once you start listening for these things, you start hearing noises that you might have otherwise ignored or dismissed. Anyway, I found that the couplers weren't staying tight. There was also lots of dust (from the frame brushing?) inside the couplers so they were gritty. Eventually I took them completely apart to clean everything out and then installed new grease, but the problem would still resurface. I tried different types of grease different torquing techniques, etc.
The biggest concern (and, in the end, the only real problem here) was that the tool they provided didn't do a good job of gripping onto the couplers. So a few of the notches were getting a bit worn or marred. This was concerning; I have no way to replace these couplers; they were custom built for this frame.
So, I ordered an official S&S coupler wrench (the small "race" one), which fit much better and solved the issue of not being able to get these tight enough without the [other] tool slipping. I also read up on couplers and getting wet/dirty, etc. The S&S tool actually came with a warning sticker on it indicating that couplers should be protected when riding in wet/muddy conditions. That seems a bit ridiculous, but I assume the warning is there for a reason.
I wrapped the couplers in electrical tape to help keep dirt out, but I think that was the point that I decided that maybe this wasn't the best choice for the all-weather daily commuter and gravel race bike. I asked Waltly if they'd give me a discount on the exact same frame but without the couplers for my daily (non-travel) use; they did (almost 30% off), so I placed another frame order.
But then I rode the coupler frame at the Hilly Billy Roubaix gravel race, on a bunch of singletrack, and then travelled with it for a couple months, riding in the mountains and on gravel -- and the issues with loosening couplers or any sort of frame noise were completely gone. So, I regretted my hasty assumption that the couplers were going to always be fussy. I think it really just needed (1) thorough cleaning, (2) a better tool (able to properly torque) and (3) the right grease. But I'm not really complaining about having a spare frame all setup for travel.
 |
| Hilly Billy Roubaix was muddy. |
 |
| Bonus! 650B 47mm WTB Horizon tires fit fine. |
 |
Really happy with this frame. If I were ordering another coupler frame, I might try to use official S&S couplers. The Waltly couplers weren't much cheaper -- and to improve chances of getting support (locally) in case something went wrong. Plus looking closely at the Waltly couplers, as I've done now, compared to S&S couplers, they are clearly designed to be exact copies and while they may be "just as good", I don't want to support copyright or patent infringement. Unfortunately S&S don't make their couplers easy for consumers to get, so there may not have been a way to use official S&S couplers on this frame either way.
I might have also spec'd a thicker (42mm, I think?) down tube, as Waltly's couplers did come in two sizes and the larger size was intended for down-tube application. The bigger tube and couplers might have been more tolerant of imperfect setup early on.
But no real regrets as I have a perfect bike that I love riding. It's so perfect, though, that I've even considered selling my Waltly road bike, since this bike does an excellent job as a road bike too.